|
|
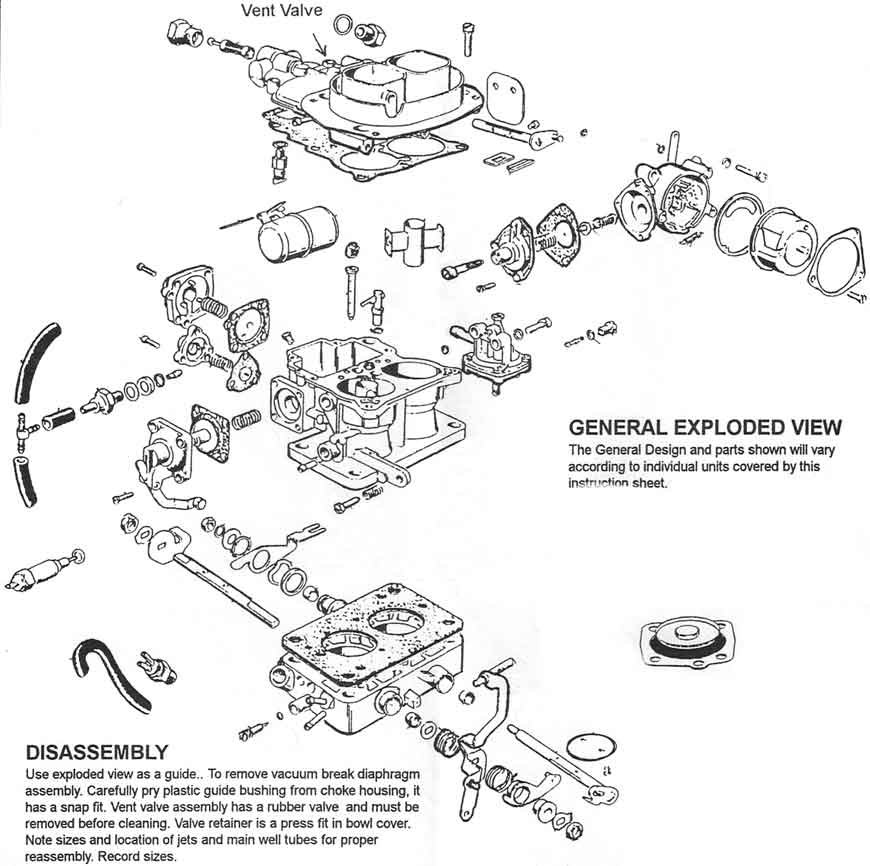
There are quite a few parts to it but nothing complicated. I have laid out this carb basically in order of where the parts are in relation to the barrels. Take note that I have placed the respective aux venturi, emulsion tube, air correction jet and main jet on each side of the carb air horn. All the primary parts on the choke side and secondary parts on the other. If this will be your first re-kit then mark all the jet sizes on your diagram that you have made. Also note if you
can see it, that I have placed all the various springs with their respective housings.
|
|
|
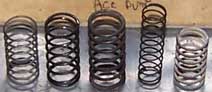
There are five springs in total fitted in this carb. By process of elimination you can work out several of them but some are interchangable and if fitted incorrectly will cause mixture problems. So keep the springs with their correct counterpart. |
|
|
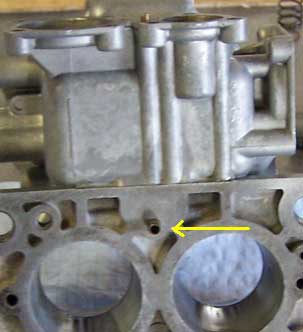
Shown are the vacuum passages to the power valve diaphragm and the boost accelerator pump. When vacuum drops to a pre-determined level the power valve diaphragm is pushed into the power jet which opens the ball to allow more fuel into the main circuit. Also the loss of vacuum applies an extra amount of fuel to the accelerator pump circuit over and above what the accelerator pump diaphragm will deliver. This will usually occur when the second barrel is opened suddenly. The
different spring length & tension will operate these devices at differing vacuum settings. |
|
|
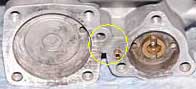
The vacuum to the power valve & accelerator pump boost diaphragms is supplied through this tube. The vacuum port continues down through to the base of the carb between the primary and secondary bores. The tube also acts as a location dowel. It is long enough to pass through the thick gasket and into the base. Now what can happen is that if you don't line up the dowel perfectly to the base and you attempt to tighten the base screws then the tube can be pushed further
into its bore in the body of the carb. The end result is a blocked vacuum passage. This will result in a rich cruise mixer and a hesitation when the second barrel opens suddenly. To check that the passage is unobstructed, place you mouth on the tube and suck or attach a tight hose and suck on it. It should feel easy to suck through. If not then this is what needs to be done. |
|
|
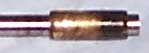
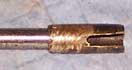
Remove the tube and the easiest way to do this is to stick a drill into the tube, then use a small pair of vice grips to grip it and twist it out. Cut a slot into the tube and then refit it back into the hole. Make sure the slot lines up with the vacuum passage and the tube protrudes through the thick gasket so it can line up with the base. The slot does not have to be as long as in the photo. If the tube is fitted at the correct depth, this mod would be unnecessary. |
|
|
|
|
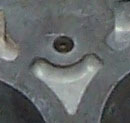
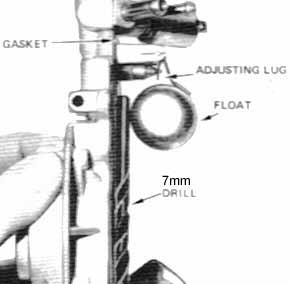
Float level settings. Orientate the top cover as shown until the float just rests against the needle & seat without compressing the ball in the needle. The gasket is installed. The measurement from the gasket to the float is 7mm. The tang in contact with the needle should be at a tangent to the needle.
|
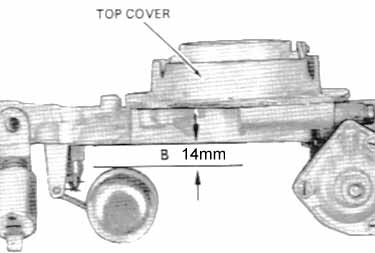
Let the float hang down and measure the distance between the float & the gasket. This distance should be 14mm. Adjust the back tang as necessary. |